In this write-up, I’ll explain the process to create a custom module in Magento 2.
Here is the detailed process:
Step 1: Create the folder of Magento/HelloWorld module in the directory app/code.
Step 2: Create etc/module.xml file.
Step 3: Create a registration.php file in directory Magento/HelloWorld.
Step 4: Enable the module.
Step 1: Module name is defined as VendorName_ModuleName.
For example:
The module name will be Magento_HelloWorld.
Directory will be: app/code/Magento/HelloWorld
Step 2: Create file module.xml in directory app/code/Magento/HelloWorld/etc
<?xml version="1.0"?>
<!--
/**
 * Copyright © Magento, Inc. All rights reserved.
 * See COPYING.txt for license details.
 */
-->
<config xmlns:xsi="http://www.w3.org/2001/XMLSchema-instance" xsi:noNamespaceSchemaLocation="urn:magento:framework:Module/etc/module.xsd">
    <module name="Magento_HelloWorld" setup_version="1.0"/>
</config>

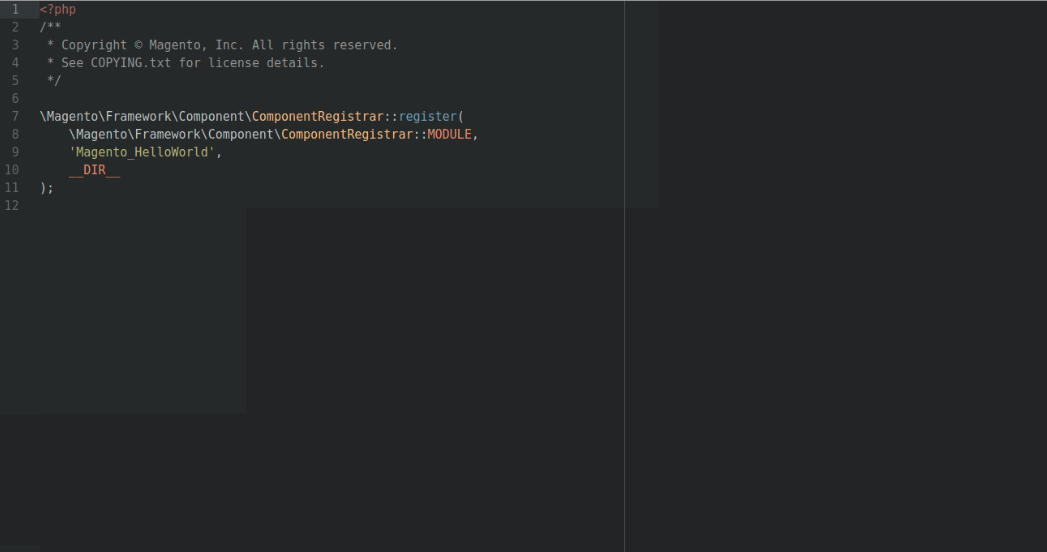
Step 3: Create registration.php file in directory Magento/HelloWorld.
<?php
/**
* Copyright © Magento, Inc. All rights reserved.
* See COPYING.txt for license details.
*/

\Magento\Framework\Component\ComponentRegistrar::register(
    \Magento\Framework\Component\ComponentRegistrar::MODULE,
    'Magento_HelloWorld',
    __DIR__
);

?>
Step 4: Enable the module as follows:
After creating the module you need to run the command in terminal as:
php bin/magento module:status
You would see the list of disabled modules as the screenshot below:

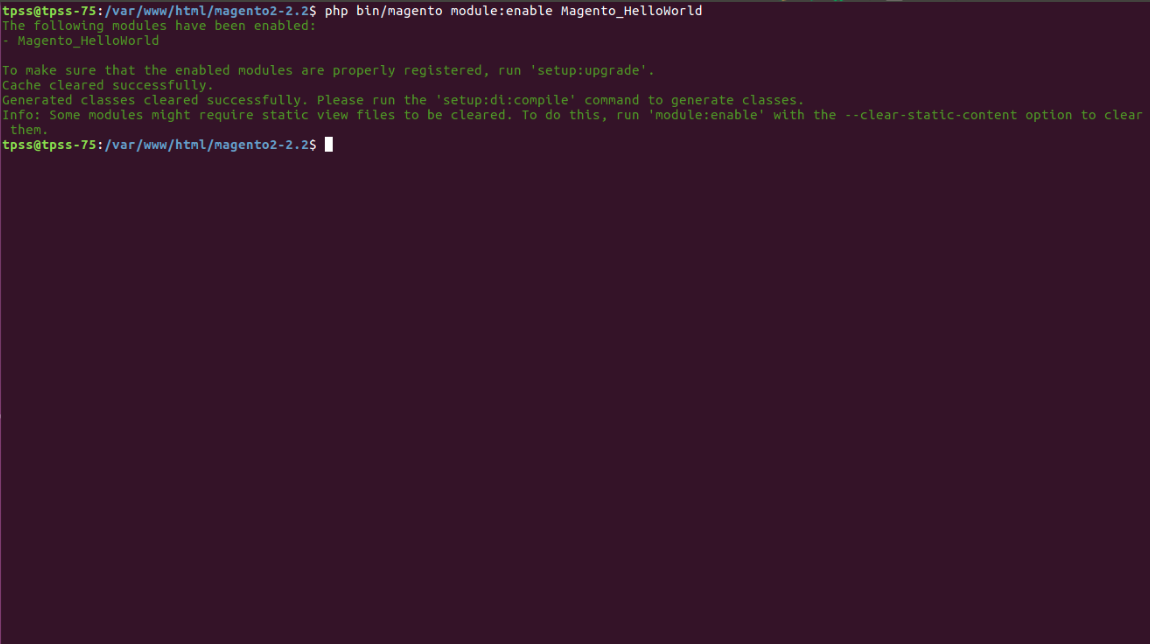
To enable the module, run the below-mentioned command:
php bin/magento module:enable Magento_HelloWorld
Now module would be available as shown below:
After that, when you open the website URL, you will get an error as shown in the following screenshot:
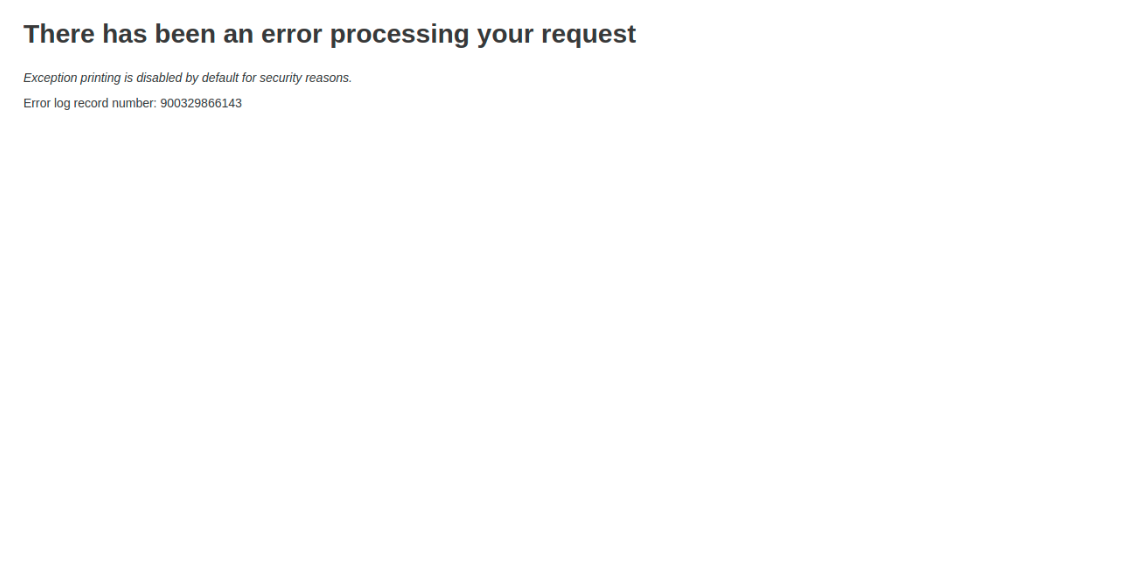
To overcome the above error, you need to run upgrade command in Magento root directory, as below:
php bin/magento setup:upgrade
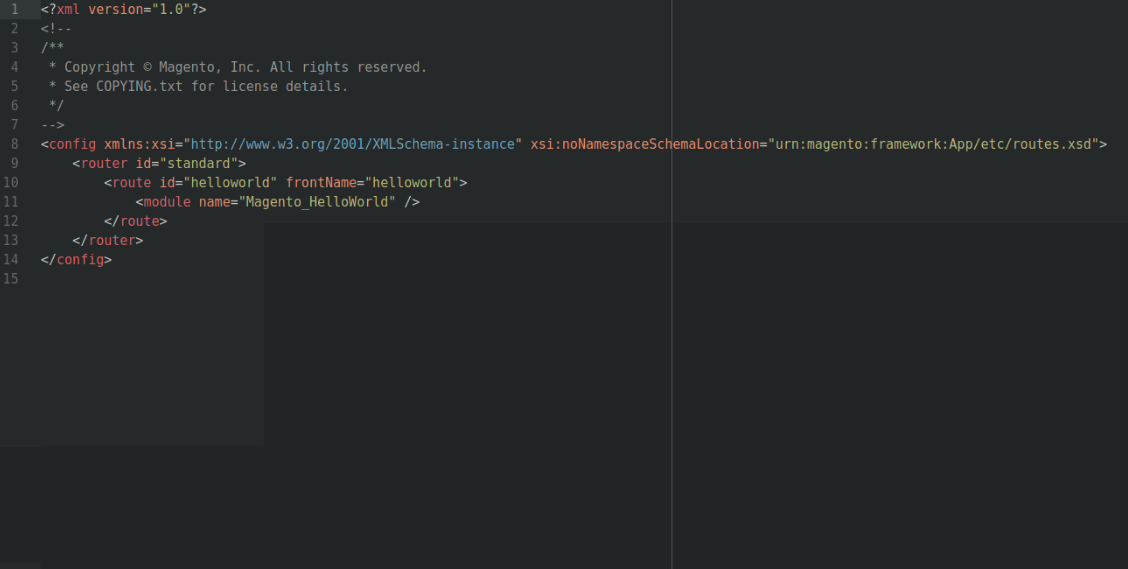
Now we need to create a route for HelloWorld module:
Routes in Magento are divided into 3 parts: Route front name, controller and action.
e.g: http://localhost/frontname/controller/action
To add a route, it is necessary to create a routes.xml file
app/code/Magento/HelloWorld/etc/frontend/routes.xml
Since this is a frontend route, we added it in frontend/ folder. If you want to create routes for backend you need to add it to adminhtml/folder
<?xml version="1.0"?>
<!--
/**
* Copyright © Magento, Inc. All rights reserved.
* See COPYING.txt for license details.
*/
-->
<config xmlns:xsi="http://www.w3.org/2001/XMLSchema-instance" xsi:noNamespaceSchemaLocation="urn:magento:framework:App/etc/routes.xsd">
    <router id="standard">
        <route id="helloworld" frontName="helloworld">
            <module name="Magento_HelloWorld" />
        </route>
    </router>
</config>
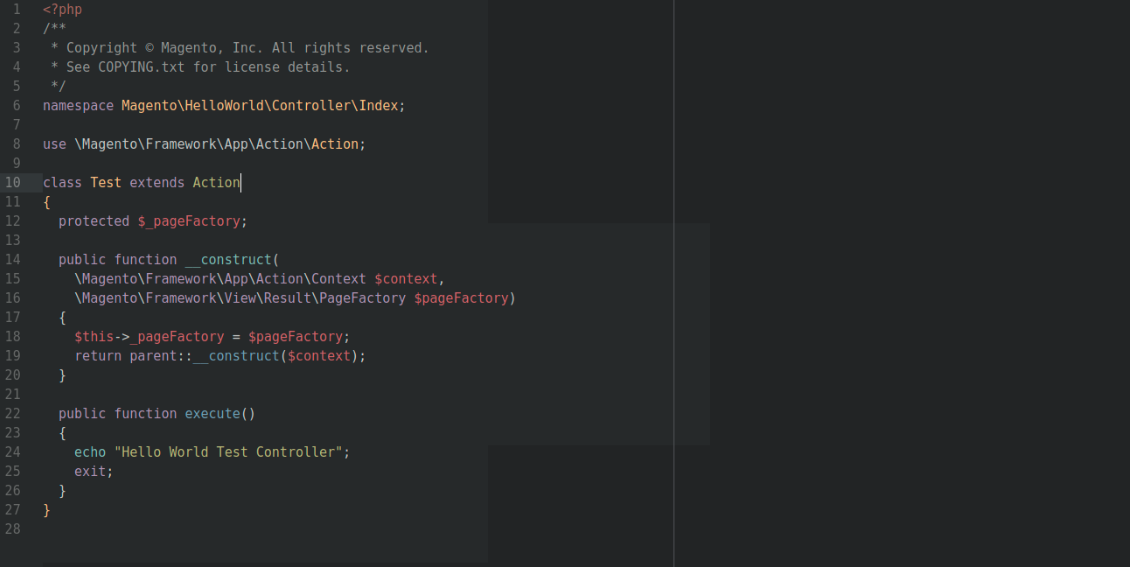
Then create a controller and action.
The folder and file that you need to create is: app/code/Magento/HelloWorld/Controller/Index/Test.php
<?php
/**
* Copyright © Magento, Inc. All rights reserved.
* See COPYING.txt for license details.
*/
namespace Magento\HelloWorld\Controller\Index;

use Magento\Framework\App\Action;

class Test extends Action
{
    protected $_pageFactory;

    public function __construct(
        \Magento\Framework\App\Action\Context $context,
        \Magento\Framework\View\Result\PageFactory $pageFactory)
    {
        $this->_pageFactory = $pageFactory;
        return parent::__construct($context);
    }

    public function execute()
    {
        echo "Hello World Test Controller";
        exit;
    }
}

?>
After that run following command:
php bin/magento cache:clean
Your URL now should be as http://localhost/helloworld/index/test
Output “Hello World Test Controller” should be displayed as in the following screenshot:

Found the article useful? Share it with your friends and co-workers… Now!
If you want to hire an expert to tell you all about it, we are just a click away – Submit your queries with us. We will make it quick and easy for you!