
In this article, I’ll explain the process of adding a custom field in a Magento 2 contact form. For the purpose of understanding, I will add a Subject field to the contact form, however, you can add your own fields to the contact form at your store.
First of all we need to create a module to override the core files. If you are not familiar with Magento 2 custom module creation, check out my previous article: How to create custom module in magento2?
Create the Module:
To configure the module, create module.xml in app/code/Magento/CustomContactForm/etc and paste the following code:
<?xml version="1.0"?>
<!--
/**
* Copyright © Magento, Inc. All rights reserved.
* See COPYING.txt for license details.
*/
-->
<config xmlns:xsi="http://www.w3.org/2001/XMLSchema-instance" xsi:noNamespaceSchemaLocation="urn:magento:framework:Module/etc/module.xsd">
    <module name="Magento_CustomContactForm" setup_version="1.0"/>
</config>
To register the module, create registration.php in app/code/Magento/CustomContactForm and paste the following code:
<?php
/**
* Copyright © Magento, Inc. All rights reserved.
* See COPYING.txt for license details.
*/

\Magento\Framework\Component\ComponentRegistrar::register(
    \Magento\Framework\Component\ComponentRegistrar::MODULE,
    'Magento_CustomContactForm',
    __DIR__
);

?>
Override and Add Custom Field in Magento 2 Contact Form
Copy form.phtml file from the vendor/magento/module-contact/view/frontend/templates and paste it into the app/code/Magento/CustomContactForm/view/frontend/templates.
Now to add a new field named Subject to the contact form, open form.phtml file and add the following code as shown in the following screenshot:
<div class="field subject required">
    <label class="label" for="subject"><span><?= $block->escapeHtml(__('Subject')) ?></span></label>
    <div class="control">
        <input name="subject" id="subject" title="<?= $block->escapeHtml(__('Subject')) ?>" value="" class="input-text" type="text" data-validate="{required:true}"/>
    </div>
</div>
After that, form.phtml file will look like:
<?php
/**
 * Copyright © Magento, Inc. All rights reserved.
 * See COPYING.txt for license details.
 */

// @codingStandardsIgnoreFile
/** @var \Magento\Contact\Block\ContactForm $block */
?>
<form class="form contact"
      action="<?= $block->escapeUrl($block->getFormAction()) ?>"
      id="contact-form"
      method="post"
      data-hasrequired="<?= $block->escapeHtmlAttr(__('* Required Fields')) ?>"
      data-mage-init='{"validation":{}}'>
    <fieldset class="fieldset">
        <legend class="legend"><span><?= $block->escapeHtml(__('Write Us')) ?></span></legend><br />
        <div class="field note no-label"><?= $block->escapeHtml(__('Jot us a note and we’ll get back to you as quickly as possible.')) ?></div>
        <div class="field name required">
            <label class="label" for="name"><span><?= $block->escapeHtml(__('Name')) ?></span></label>
            <div class="control">
                <input name="name" id="name" title="<?= $block->escapeHtmlAttr(__('Name')) ?>" value="<?= $block->escapeHtmlAttr($this->helper('Magento\Contact\Helper\Data')->getPostValue('name') ?: $this->helper('Magento\Contact\Helper\Data')->getUserName()) ?>" class="input-text" type="text" data-validate="{required:true}"/>
            </div>
        </div>
        <div class="field email required">
            <label class="label" for="email"><span><?= $block->escapeHtml(__('Email')) ?></span></label>
            <div class="control">
                <input name="email" id="email" title="<?= $block->escapeHtmlAttr(__('Email')) ?>" value="<?= $block->escapeHtmlAttr($this->helper('Magento\Contact\Helper\Data')->getPostValue('email') ?: $this->helper('Magento\Contact\Helper\Data')->getUserEmail()) ?>" class="input-text" type="email" data-validate="{required:true, 'validate-email':true}"/>
            </div>
        </div>
        <!-- Custom field -->
        <div class="field subject required">
            <label class="label" for="subject"><span><?= $block->escapeHtml(__('Subject')) ?></span></label>
            <div class="control">
                <input name="subject" id="subject" title="<?= $block->escapeHtml(__('Subject')) ?>" value="" class="input-text" type="text" data-validate="{required:true}"/>
            </div>
        </div>
        <!-- Custom field -->
        <div class="field telephone">
            <label class="label" for="telephone"><span><?= $block->escapeHtml(__('Phone Number')) ?></span></label>
            <div class="control">
                <input name="telephone" id="telephone" title="<?= $block->escapeHtmlAttr(__('Phone Number')) ?>" value="<?= $block->escapeHtmlAttr($this->helper('Magento\Contact\Helper\Data')->getPostValue('telephone')) ?>" class="input-text" type="text" />
            </div>
        </div>
        <div class="field comment required">
            <label class="label" for="comment"><span><?= $block->escapeHtml(__('What’s on your mind?')) ?></span></label>
            <div class="control">
                <textarea name="comment" id="comment" title="<?= $block->escapeHtmlAttr(__('What’s on your mind?')) ?>" class="input-text" cols="5" rows="3" data-validate="{required:true}"><?= $block->escapeHtml($this->helper('Magento\Contact\Helper\Data')->getPostValue('comment')) ?></textarea>
            </div>
        </div>
        <?= $block->getChildHtml('form.additional.info') ?>
    </fieldset>
    <div class="actions-toolbar">
        <div class="primary">
            <input type="hidden" name="hideit" id="hideit" value="" />
            <button type="submit" title="<?= $block->escapeHtmlAttr(__('Submit')) ?>" class="action submit primary">
                <span><?= $block->escapeHtml(__('Submit')) ?></span>
            </button>
        </div>
    </div>
</form>
Now create contact_index_index.xml in app/code/Magento/CustomContactForm/view/frontend/layout and paste the following code that overrides the original form.phtml file with the module’s form.phtml file.
<?xml version="1.0"?>
<!--
/**
* Copyright © Magento, Inc. All rights reserved.
* See COPYING.txt for license details.
*/
-->
<page xmlns:xsi="http://www.w3.org/2001/XMLSchema-instance" layout="1column" xsi:noNamespaceSchemaLocation="urn:magento:framework:View/Layout/etc/page_configuration.xsd">
    <head>
        <title>Contact Us</title>
    </head>
    <body>
        <referenceBlock name="contactForm" remove="true"/>
        <referenceContainer name="content">
            <block class="Magento\Contact\Block\ContactForm" name="customContactForm" template="Magento_CustomContactForm::form.phtml" />
        </referenceContainer>
    </body>
</page>
Run CLI Commands
open the terminal and run the following commands:
php bin/magento setup:upgrade
php bin/magento setup:di:compile
php bin/magento setup:static-content:deploy
php bin/magento cache:clean
php bin/magento cache:flush
Add the new Email Template
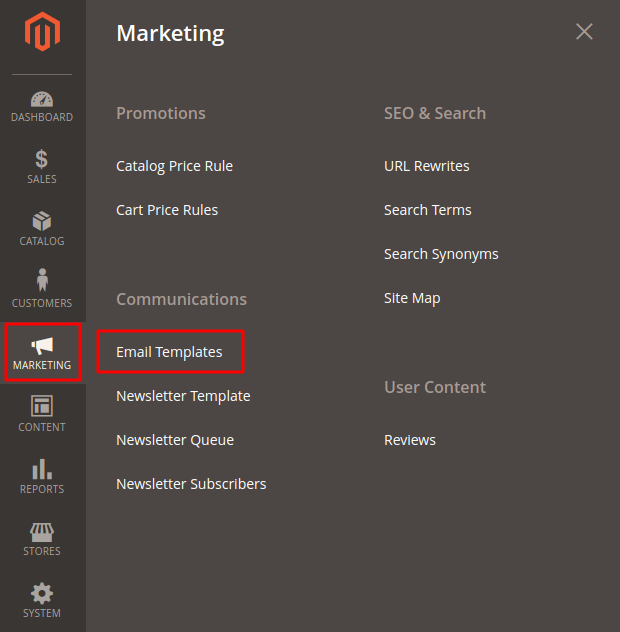
Go to admin of your store and navigate to MARKETING → Email Templates as shown in the below screenshot:
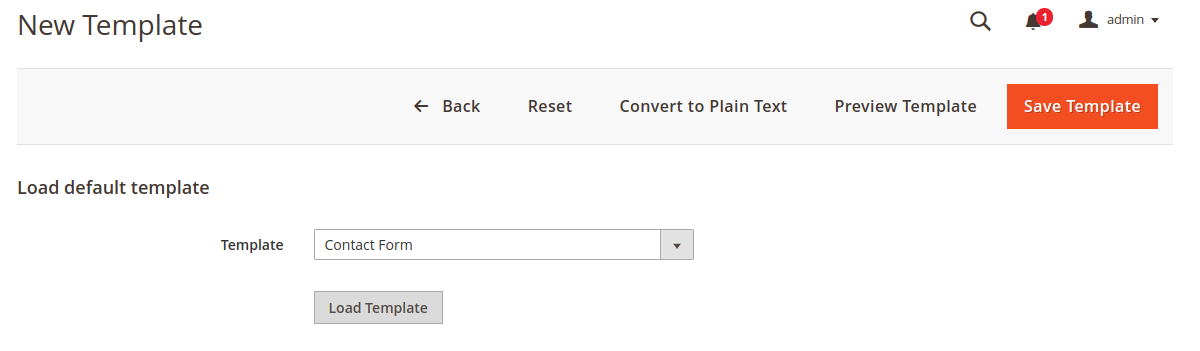
Click on Add New Template button as shown in the below screenshot:

Now go to Load default template section, select Contact Form from the Template drop-down and click the Load Template button:
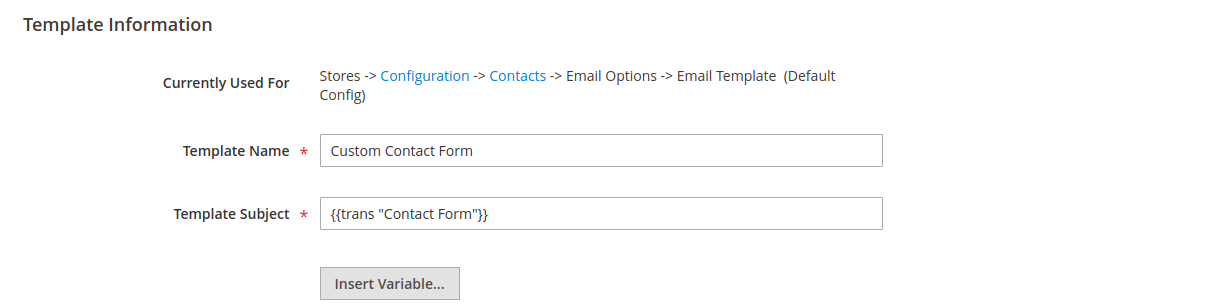
Enter the template name. I am using the Custom Contact Form.
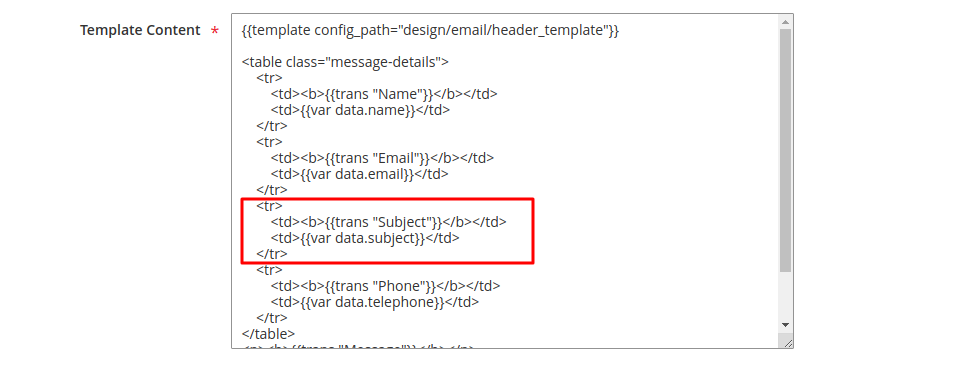
Now, in order to receive a text from the custom field which you have added in the form.phtml, go to Template Content field and add the following code in it:
<tr>
    <td><b>{{trans "Subject"}}</b></td>
    <td>{{var data.subject}}</td>
</tr>
Click the Save Template button at the top of the page as shown in the screenshot below:

Change Email Template
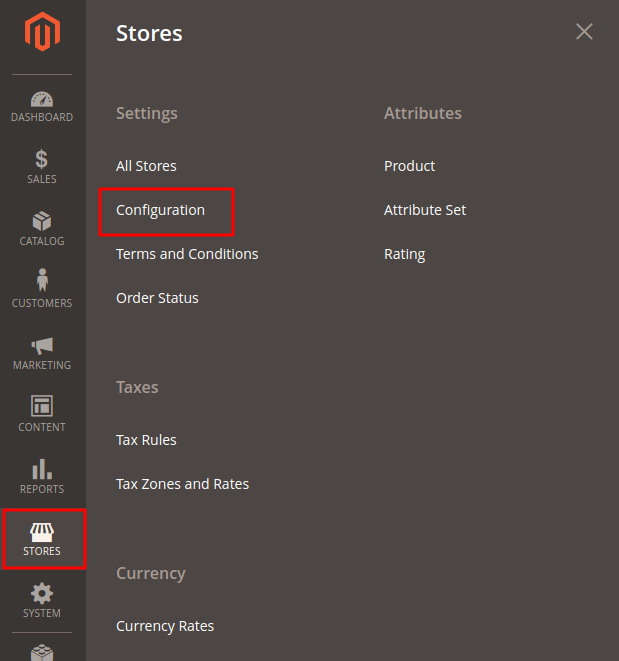
Now go to STORES → Configuration as mentioned below:
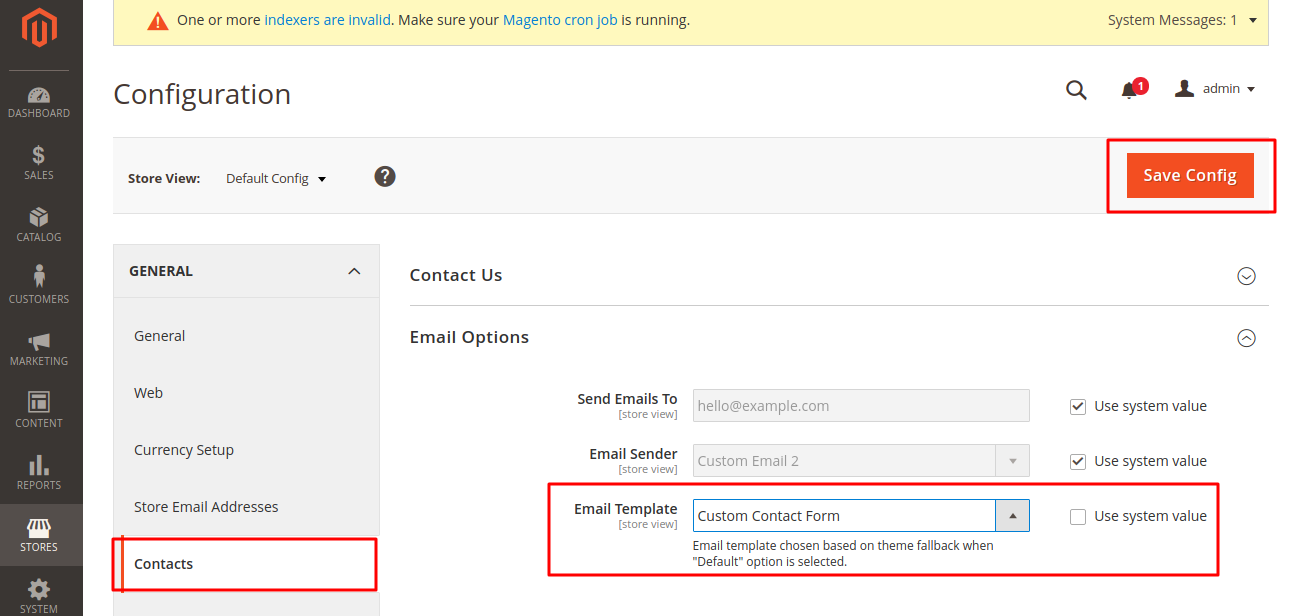
Click on Contacts under the General tab and go to the Email Options section, select Custom Contact Form from Email Template drop-down option & click the Save Config button:
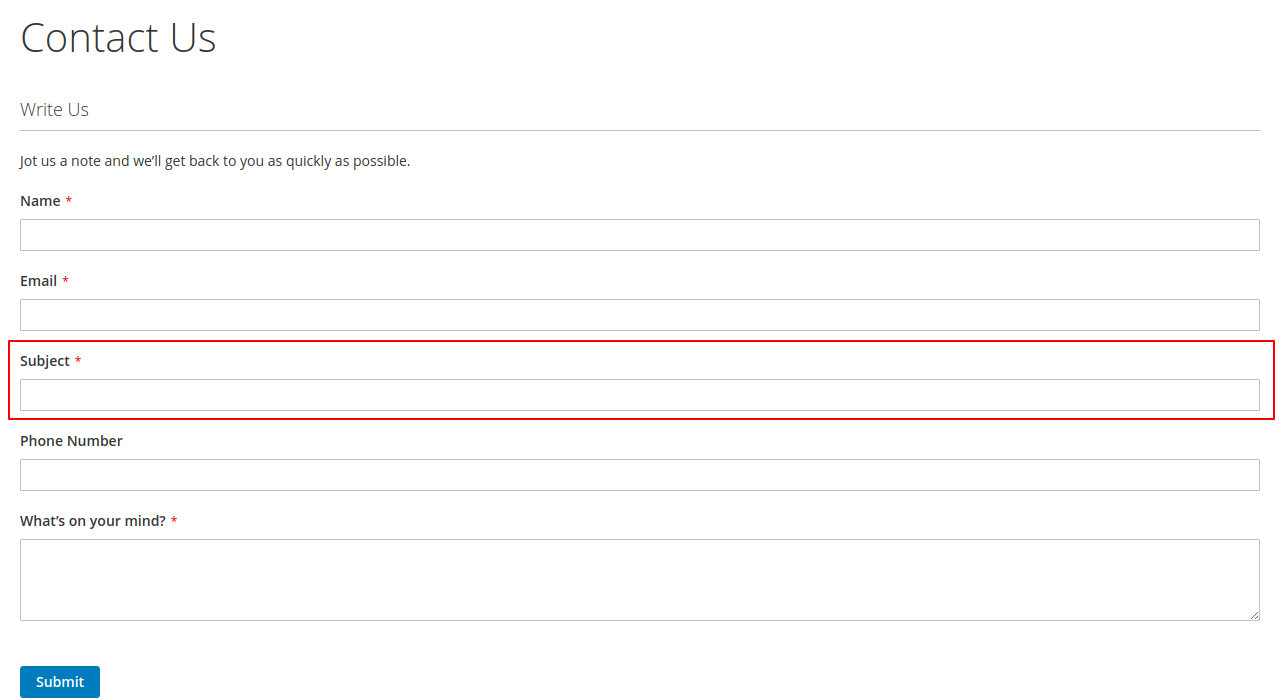
Go to the Contact page where you will see the new field Subject as mentioned in the screenshot below:
Share your views/queries in comments and do share it with your friends if you find the article helpful.
Also Read- How to create a Custom Module in Magento2