Laravel
Laravel is a web application framework with an expressive, elegant syntax. We believe development must be an enjoyable, creative experience to be truly fulfilling. Laravel is accessible, yet powerful, providing powerful tools needed for large, robust applications.
Dropzone
- DropzoneJS is an open source library that provides drag-drop file uploads with image previews.
- It is lightweight and is highly customizable.
Note: Dropzone does not handle your file uploads on the server. You need to implement the code to receive and store the file yourself.
In this example, I am using Laravel 5.5, this tutorial explains the following:
1) Multiple image upload using drag and drop.
2) Saving images with various file names to the database.
3) Show thumbnail of uploaded and existing images.
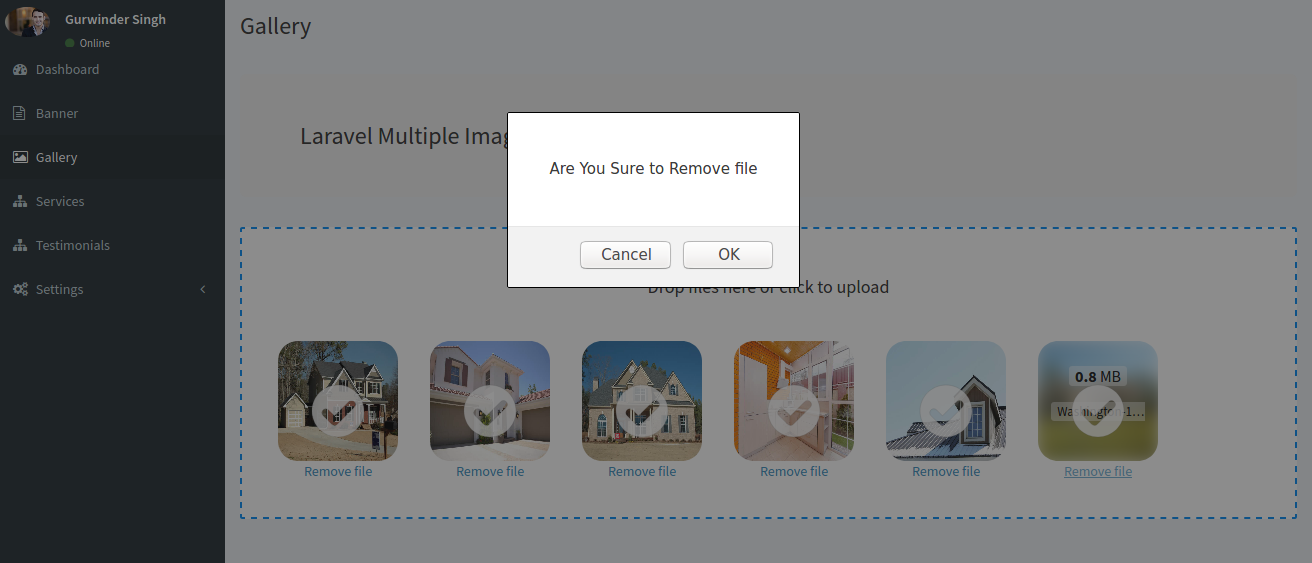
4) Deleting images directly from the dropzone preview box.
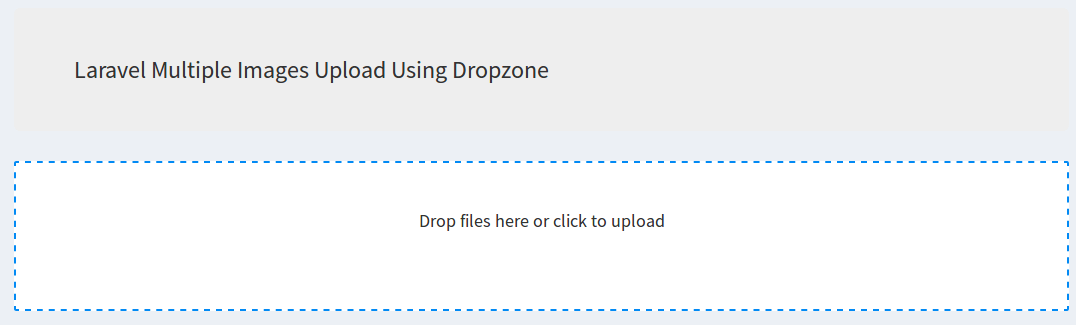
Laravel Multiple Images Upload Using Dropzone
Step 1: Install Laravel Project
Step 2: Set up a MySQL database
Step 3: Compose a model and migration file
Step 4: Run Migration
Step 5: Create a layout file
Step 6: Create the custom-style.css file
Step 7: Create a view file
Step 8: Configure Dropzone
Step 9: Create a controller.
Step 10: Register Routes.
Step 11: Create Folder to uploaded images
Step 12: Save File into Database
Step 13: Get(Show) Uploaded Files
Step 14: Delete File From Database
Step 1: Install Laravel Project
composer create-project --prefer-dist laravel/laravel multiuploads
Step 2: Set up a MySQL database
Setup the database in the .env file.
DB_CONNECTION=mysql
DB_HOST=127.0.0.1
DB_PORT=3306
DB_DATABASE=databasename
DB_USERNAME=username
DB_PASSWORD=password
Step 3: Compose a model and migration file
$ php artisan make:model Gallery -m
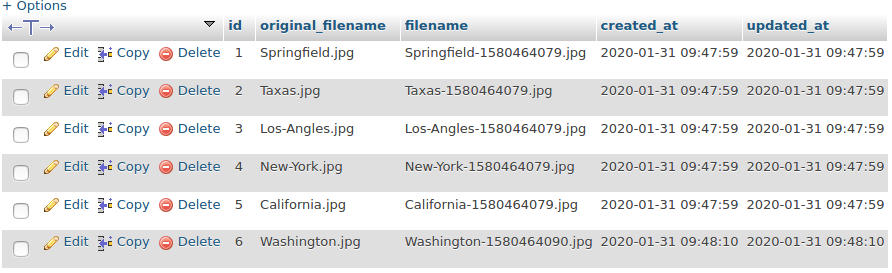
1) Gallery.php (Model File)
2) 2019_01_30_064607_create_gallery_table.php (Migration File)
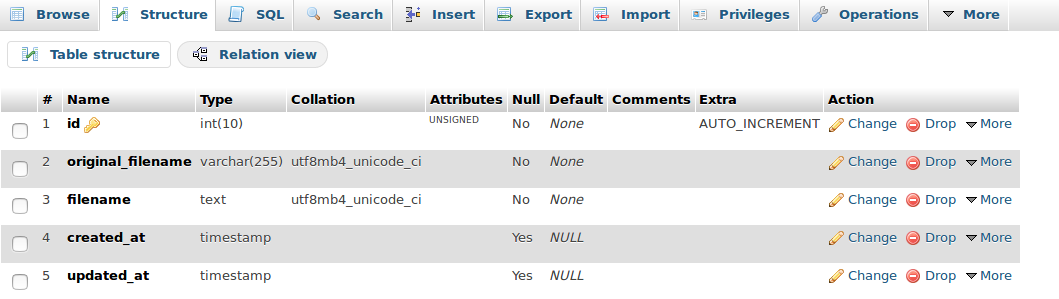
We need to create Schema for the gallery table. So navigate to multiuploads >> database >> migrations >> 2019_01_30_064607_create_gallery_table.php
public function up()
{
      Schema::create('gallery', function (Blueprint $table) {
            $table->increments('id');
            $table->string('original_filename');
            $table->string('filename');
            $table->timestamps();
      });
}
Step 4: Run Migration
php artisan migrate
Step 5: Create a layout file
Create a file in resources >> views >> layouts >> adminlayout.blade.php
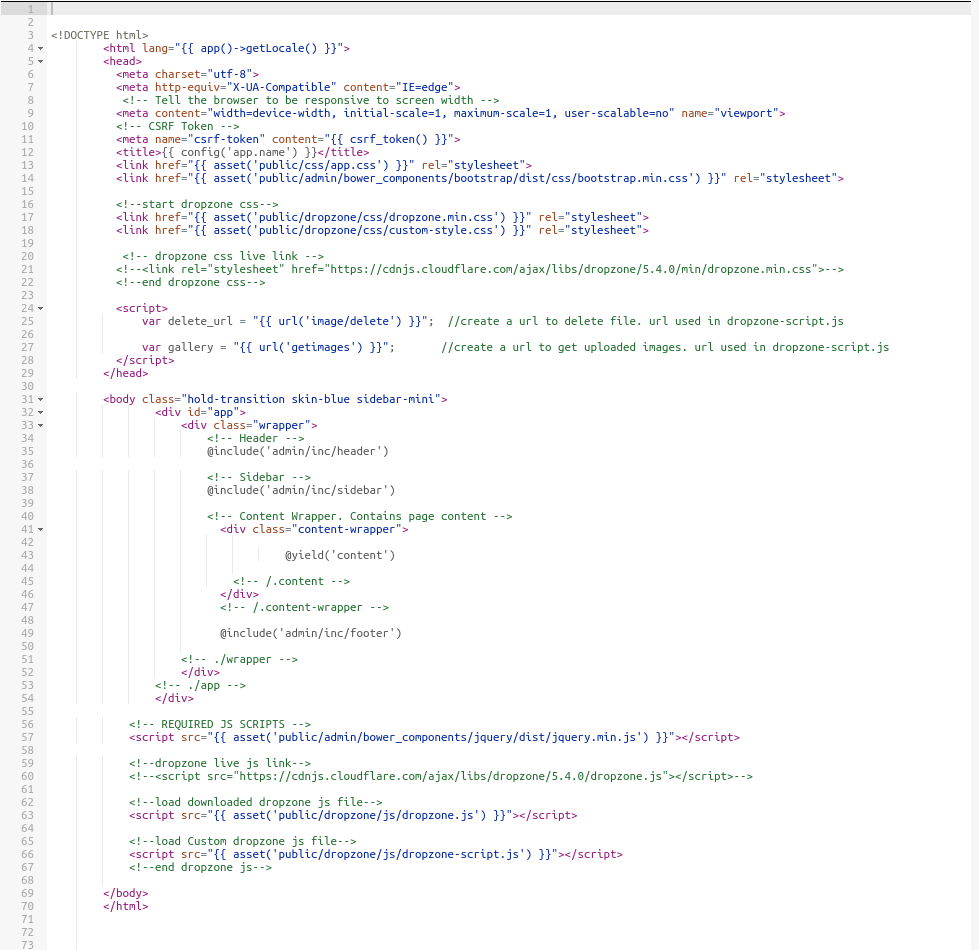
In adminlayout.blade.php file, I added these CSS files in head section.
1) app.css
2) bootstrap.min.css
3) dropzone.min.css
4) custom-style.css
Then I added js files above the body tag in this file.
1) jquery.js
2) dropzone.js
3) dropzone-script.js
Step 6: Create custom-style.css
Write this code to style the dropzone box and images previews.
.dz-image img {
    width: 100%;
    height: 100%;
}
.dropzone.dz-started .dz-message {
	display: block !important;
}
.dropzone {
	border: 2px dashed #028AF4 !important;;
}
.dropzone .dz-preview.dz-complete .dz-success-mark {
    opacity: 1;
}
.dropzone .dz-preview.dz-error .dz-success-mark {
    opacity: 0;
}
.dropzone .dz-preview .dz-error-message{
	top: 144px;
}
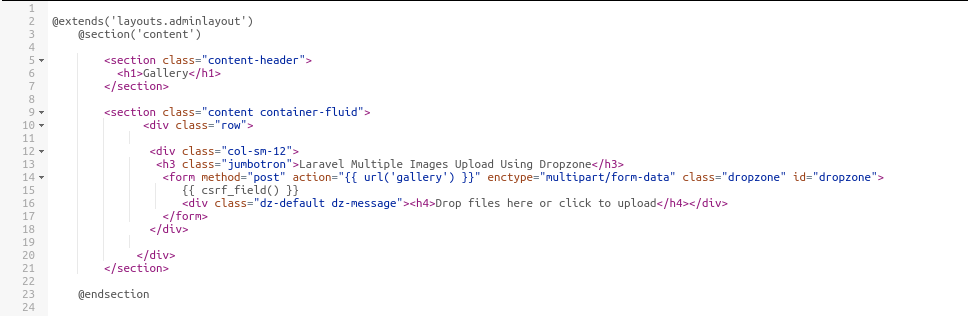
Step 7: Create a view file
Create a view file in : resources >> views >> backend >> gallery >> index.blade.php
Step 8: Configure Dropzone
Create a dropzone-script.js file to configure dropzone.
 Dropzone.options.dropzone =
         {
	    maxFiles: 5,
            maxFilesize: 4,
            //~ renameFile: function(file) {
                //~ var dt = new Date();
                //~ var time = dt.getTime();
               //~ return time+"-"+file.name;    // to rename file name but i didn't use it. i renamed file with php in controller.
            //~ },
            acceptedFiles: ".jpeg,.jpg,.png,.gif",
            addRemoveLinks: true,
            timeout: 50000,
            init:function() {

				// Get images
				var myDropzone = this;
				$.ajax({
					url: gallery,
					type: 'GET',
					dataType: 'json',
					success: function(data){
					//console.log(data);
					$.each(data, function (key, value) {

						var file = {name: value.name, size: value.size};
						myDropzone.options.addedfile.call(myDropzone, file);
						myDropzone.options.thumbnail.call(myDropzone, file, value.path);
						myDropzone.emit("complete", file);
					});
					}
				});
			},
            removedfile: function(file)
            {
				if (this.options.dictRemoveFile) {
				  return Dropzone.confirm("Are You Sure to "+this.options.dictRemoveFile, function() {
					if(file.previewElement.id != ""){
						var name = file.previewElement.id;
					}else{
						var name = file.name;
					}
					//console.log(name);
					$.ajax({
						headers: {
							  'X-CSRF-TOKEN': $('meta[name="csrf-token"]').attr('content')
							  },
						type: 'POST',
						url: delete_url,
						data: {filename: name},
						success: function (data){
							alert(data.success +" File has been successfully removed!");
						},
						error: function(e) {
							console.log(e);
						}});
						var fileRef;
						return (fileRef = file.previewElement) != null ?
						fileRef.parentNode.removeChild(file.previewElement) : void 0;
				   });
			    }
            },

            success: function(file, response)
            {
				file.previewElement.id = response.success;
				//console.log(file);
				// set new images names in dropzone’s preview box.
                var olddatadzname = file.previewElement.querySelector("[data-dz-name]");
				file.previewElement.querySelector("img").alt = response.success;
				olddatadzname.innerHTML = response.success;
            },
            error: function(file, response)
            {
               if($.type(response) === "string")
					var message = response; //dropzone sends it's own error messages in string
				else
					var message = response.message;
				file.previewElement.classList.add("dz-error");
				_ref = file.previewElement.querySelectorAll("[data-dz-errormessage]");
				_results = [];
				for (_i = 0, _len = _ref.length; _i < _len; _i++) {
					node = _ref[_i];
					_results.push(node.textContent = message);
				}
				return _results;
            }

};
In the file above, append configuration options for Dropzone. You can find any of the configuration options available on the dropzone documentation.
* Now let’s go through each option.
1) maxFiles Can be used to limit the maximum number of files that will be handled by this Dropzone. maxFiles is set to 5, allowing me to select up to 5 files. You can change based on your needs.
2) maxFilesize is set to 4. Dropzone will only allow images with a size of less than 4MB. You can make it smaller or greater based on your requirements.
3) renameFile function that is invoked before the file is uploaded to the server and renames the file.
4) acceptedFiles checks the file’s mime type or extension against this list. We define .jpeg,.jpg,.png,.gif. You can change based on your needs.
5) addRemoveLinks is set to true. Dropzone will display Remove button to remove our uploaded file.
6) timeout is set to 5000.
Step 9: Create controller
I created one controller file called GalleryController.php
public function index()
{
     return view('backend/gallery/index');
}
In index method, simply returning index.blade.php which i created in resources >> views >> backend >> gallery >> index.blade.php.
Step 10: Register Routes
Route::resource('gallery','GalleryController')->middleware('auth');
Route::get('getimages','GalleryController@getImages');
Route::post('image/delete','GalleryController@destroy');
Step 11: Create Folder to Uploaded Images
Create a folder in public >> uploads >> gallery

Step 12: Save File into Database
Save file names in database table and upload images in the uploads/gallery folder.
public function store(Request $request)
{
	$image = $request->file('file');
	$fileInfo = $image->getClientOriginalName();
	$filename = pathinfo($fileInfo, PATHINFO_FILENAME);
	$extension = pathinfo($fileInfo, PATHINFO_EXTENSION);
	$file_name= $filename.'-'.time().'.'.$extension;
	$image->move(public_path('uploads/gallery'),$file_name);

	$imageUpload = new Gallery;
	$imageUpload->original_filename = $fileInfo;
	$imageUpload->filename = $file_name;
	$imageUpload->save();
	return response()->json(['success'=>$file_name]);
}
Step 13: Get Uploaded Images function
GalleryController.php
public function getImages()
{
	$images = Gallery::all()->toArray();
	foreach($images as $image){
		$tableImages[] = $image['filename'];
	}
	$storeFolder = public_path('uploads/gallery');
	$file_path = public_path('uploads/gallery/');
	$files = scandir($storeFolder);
	foreach ( $files as $file ) {
		if ($file !='.' && $file !='..' && in_array($file,$tableImages)) {
			$obj['name'] = $file;
			$file_path = public_path('uploads/gallery/').$file;
			$obj['size'] = filesize($file_path);
			$obj['path'] = url('public/uploads/gallery/'.$file);
			$data[] = $obj;
		}

	}
	//dd($data);
	return response()->json($data);
}
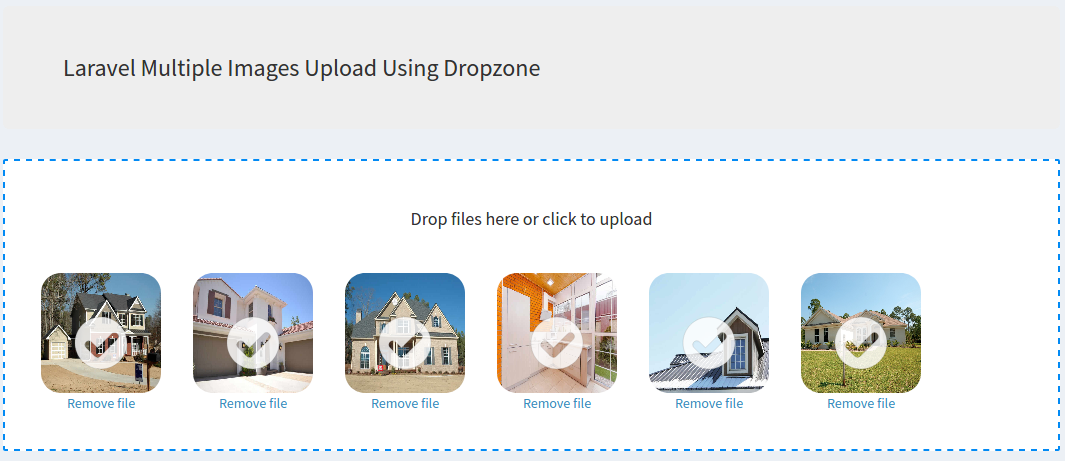
Note: Image previews require three arguments of the file (name, size, path). used in dropzone-script.js file.
$.each(data, function (key, value) {
	var file = {name: value.name, size: value.size};
	myDropzone.options.addedfile.call(myDropzone, file);
	myDropzone.options.thumbnail.call(myDropzone, file, value.path);
	myDropzone.emit("complete", file);
});
Step 14: Delete file function
GalleryController.php
public function destroy(Request $request)
{
	$filename =  $request->get('filename');
	Gallery::where('filename',$filename)->delete();
	$path = public_path('uploads/gallery/').$filename;
	if (file_exists($path)) {
		unlink($path);
	}
	return response()->json(['success'=>$filename]);
}