
What is nopCommerce?
In ASP.net technology, there are various E-commerce platforms available in the market, but nopCommerce is the most preferred open source e-commerce platform. nopCommerce is suitable for all kinds of businesses from stand-alone entrepreneurs to large corporates. It provides a well-structured e-commerce solution that makes the website management an easy job. It provides both front-end & back-end features and enables the admin to handle the content easily. In nopCommerce, you can easily manage multiple stores and vendors. Every vendor will have its own dedicated admin panel where they can update the products and other features.
The nopCommerce platform also has various other features like multi-language support, easy tax system, wish-list, coupons, discount, etc. You may follow the below-mentioned link to see all the features:
https://www.nopcommerce.com/featurelist.aspx
How to install the nopCommerce:
Here is how to set-up the nopCommerce on your system:
The first & very important step is to fulfill the system requirements to make it compatible with nopCommerce. We need to install visual studio and SQL server on your operating system prior to setting up nopCommerce.
Steps to install nopCommerce:
1) We can download the latest version of noPcommerce from the following link: https://www.nopcommerce.com/downloads.aspx.
Currently “4.10” version is the latest version available to download from the nopCommerce website.
Here is the screenshot of the downloaded folder of nop 3.80 version:

2) In the downloaded folder, we can see the nopCommerce.sln file. Open it using the Visual Studio and you will see all Nop folders in the visual studio solution explorer. You will be asked to fill in the store information and create the database for the website in Nop for executing the project. You may refer to the screenshot given below for the same:
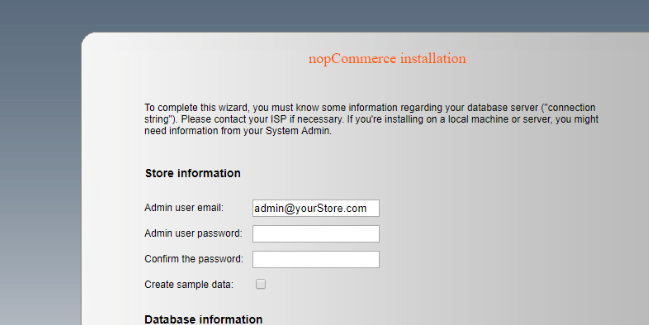
Here we have to enter the Store/website information which contains Admin Email, Admin Password, Confirm Password and Create Sample data checkbox. If we select this checkbox then nopCommerce will install with sample data like dummy products, images, content, etc.
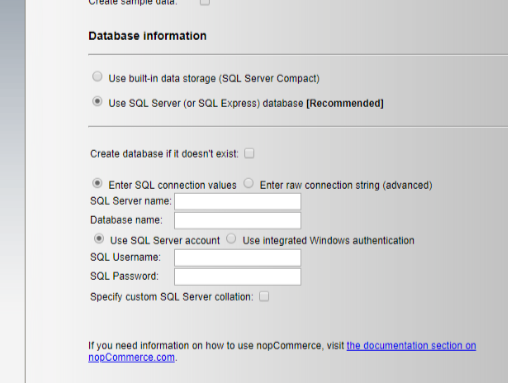
3) To create the database for your website, you need to key-in the information like SQL server name, username, password, and database name and click the “install” button.
It will automatically create all the shopping cart database tables, views, and store-procedures.
4) The nopCommerce installation process takes a short while after clicking on the “install” button and the database gets created in the background.

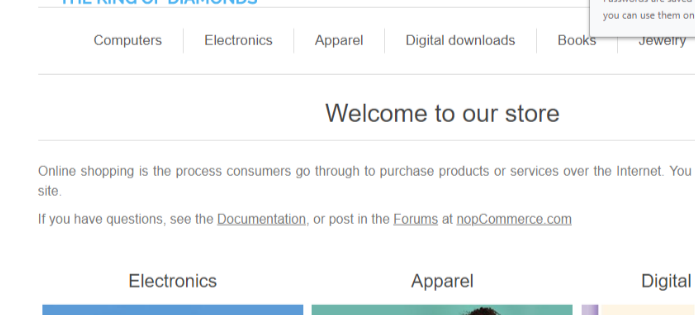
5) After successfully completing the installation, it will redirect to the front-end of the website as mentioned in the following screenshot:
Now the nopCommerce is ready to use for the website development. There are numerous free themes available for the implementation (you may do a Google search). Based on the project requirement, you may customize or develop custom features in nopCommerce
Found the article useful? Share it with your friends and co-workers… Now!
If you have any queries or doubts about this topic please feel free to contact us. We are here to help you!


![Headless eCommerce For Your Business [6 Benefits You Should Know]](https://www.tech-prastish.com/wp-content/uploads/2022/04/blog-cover-image-10-04-2025-300x188.png)