JETPACK plugin is a default WordPress plugin and most of the hosting providers provide it as a default pre-installed plugin. Unlike most other plugins, activating it is a little more complicated than a single click. You don’t need to worry if you didn’t find JETPACK plugin in your website, follow this article and you will learn easy steps on how to install and how to use this plugin.
The requirement for JETPACK plugin
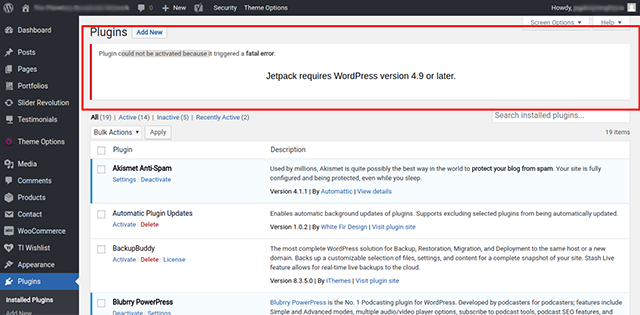
1) You need WordPress version 4.9 or above to use this plugin (refer to the below screenshot).
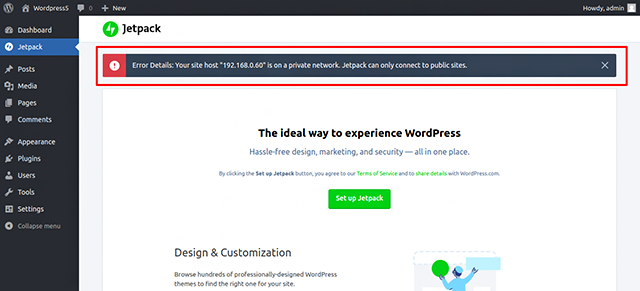
2) JETPACK doesn’t work on a private network. For more info see below screenshot:
How to install JETPACK plugin?
There are three ways to install.
1) To download the plugin you can use this URL (https://wordpress.org/plugins/jetpack/). After downloading, you can upload this in Plugins -> Add new -> Upload Plugin.
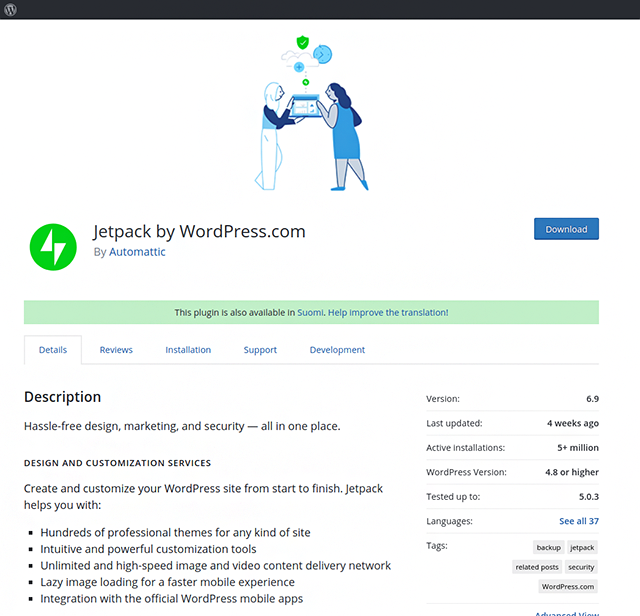
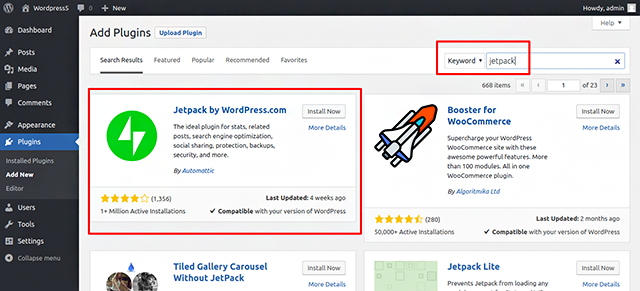
2) The second easy method is going to this tab as Plugins -> Add new and you can search keyword “JETPACK”. You can install this plugin by a simple click. For more info refer to the below-mentioned screenshot:
3) Automatic Installation: You can buy this plugin or free version is also available with limited access. As per your requirement, you can buy or use the free version of this plugin from the following link:
https://wordpress.com/jetpack/connect/store
How to set up this plugin:
After a successful installation of this plugin the following page will appear:

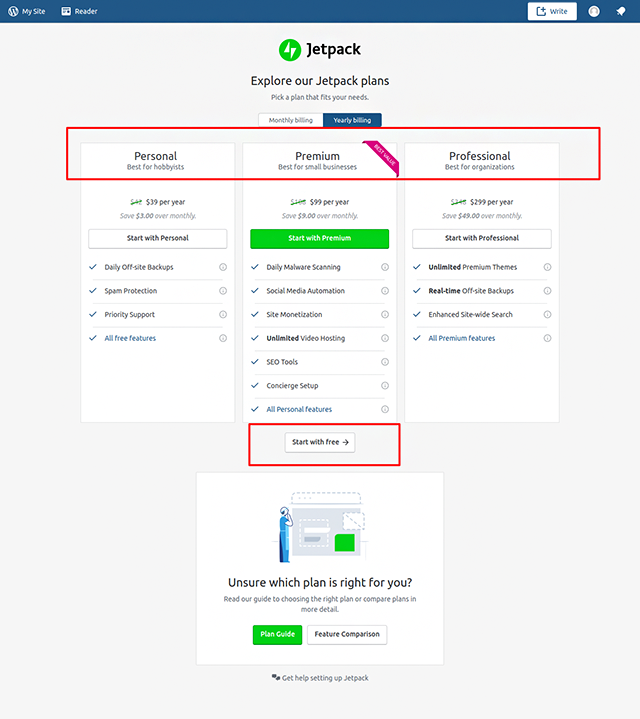
After completing the above steps you will see the setup page for JETPACK settings. When you click on the setup button it will redirect you to wordpress.org website and connect your website with wordpress.org as shown below:
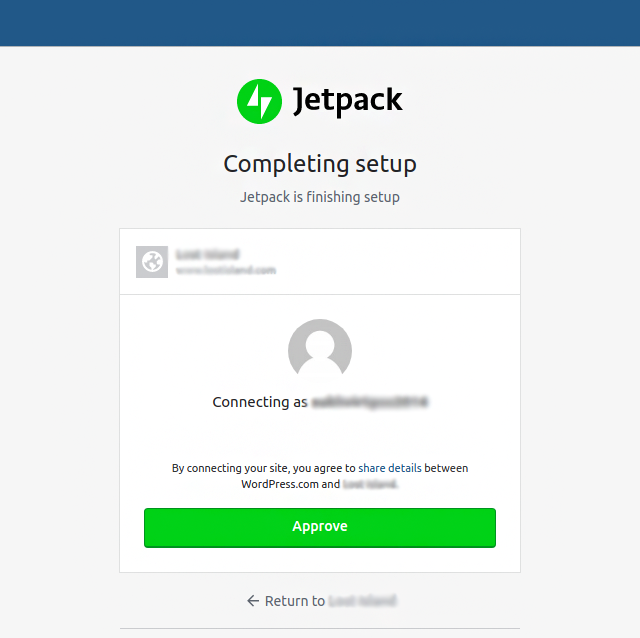
Then you need to click on the “approve” button and it will take 1-2 minutes for approval. After approval, you will be redirected to your website’s wp-admin dashboard and the following message will pop up:
“Your Jetpack site is ready to go”.
How to activate features
To activate the list of default modules, click on the “Activate recommended” feature. You can manage a number of functionalities from the admin dashboard as follows:
1) Improve your website’s performance and speed:
You can improve website speed by simply activating that functionality. It will help the website accelerator to load pages faster and optimize your images.
2) Website Stats:
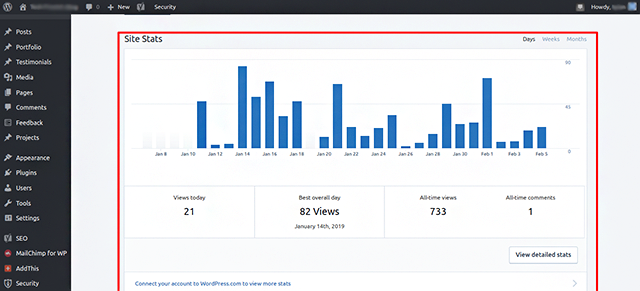
In this, you can check the count of visitors on your website. You can refer to the below screenshot showing a date wise graphical representation of the visitors on your website. You can use various filters like DAYS, WEEKS, MONTHS to view the traffic as you desire.
VIEW DETAILED STATS
It depicts the total number of users who visited your website and the total number of views also in the form of a graph. Click on the “VIEW DETAILED STATS” button and you can get a lot more information about that website like you can find visitors on a specific post or page, search engine keywords, etc.
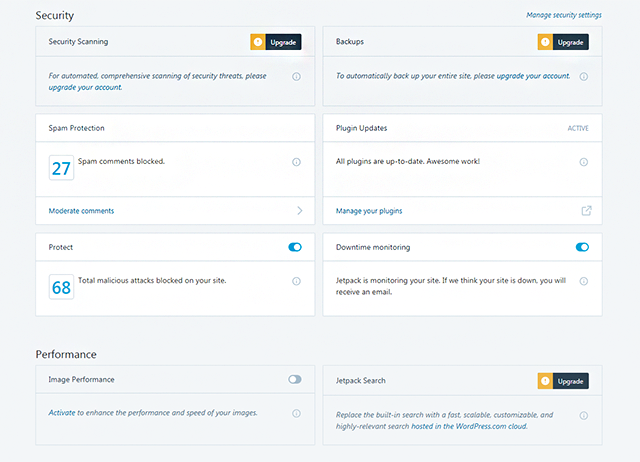
3) Security:
In JETPACK plugins you can check security benefits. It will help to scan whole website folders as well as files but this feature is not available in the free version.
4) Backups:
You can also manage automatically back up of your entire website but for this, you need to go for the paid version.
5) Spam Protection:
It also helps to prevent spam comments. It also shows the total number of spam comments on the dashboard.
6) Plugin Updates:
This plugin comes with a unique feature and that is if any plugin is pending for updation, JETPACK notifies you.
7) Protect:
You can protect your website from malicious login attempts and JETPACK will block those users.
8) Downtime monitoring:
It notifies you if at your website crashes and notifies you again when it’s up and going. You can check the records anytime to see when was your website was down due to server problems or any other issue.
There is a long list of features available in this plugin that you can install and get benefited from. You can improve your business performance by using JETPACK. Hooks are also available for this plugin and using them you can manage data according to your requirements.
Thank you for taking the time to read my article.
Click the share button if you find it useful!
Cheers!!!
If you have any queries or doubts about this topic please feel free to contact us. We are here to help you!


![How to Change Your WordPress Theme Safely – [Full Guide]](https://www.tech-prastish.com/wp-content/uploads/2019/03/Blog-image-300x176.jpg)